Rectangular folded box
You can find many folding instructions for square boxes - I also published one - see here. Rectangular ones are somewhat more seldom to find. I needed one, so I made a simple one by myself. I will show you what I did. Please try and improve it.
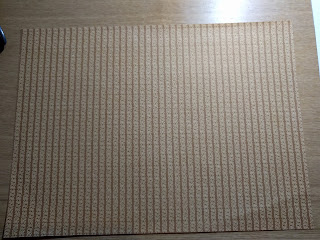
Paper: When I digitized my books, I cut off the spine so I could use an automatic scanner for scanning the text pages. Usually, I kept the first and last paper pages which often are coloured and/or have some design. They also are a little bit heavier than the normal paper of the books.
For making the box below I used such a page.
Plan: I want to make a box, 14 cm long, 2 cm wide and 2 cm high. I need the box and a cover for it: so 2 boxes, the first one with the dimensions above and the second one, the cover box, a bit larger with 14.5 cm long and 2.5 cm wide.
From a paper sheet, I cut 2 sheets with the following dimensions (box length + 4 times box height). For my boxes, I need one paper with the size of 22cm*6cm and the second one should be 22.5cm*6.5cm.
Actually, instead of 0.5 cm difference, it will be better to use only 0.3cm difference.
You will see later, why.
I folded the sheet along the long side so that it had three sections of 2cm each. This should be done with care - check for the design on the outside (I realized this too late).
The cover has three sections, 2+2.5+2cm.
At the ends, I folded two sections of 2cm perpendicular to the length. In the inner section, I folded it across.
Then fold the outer section into the box - first from the right and then from the left.
(It is easier to make than to explain.)
After folding, it looks like in the picture. As the paper is a bit stiff, it is necessary to add adhesive to keep the papers together.

Finished, the two boxes will look like this.
The larger one is the cover of the smaller one. 0.5cm is a bit too much difference, 0.3cm will fit better, I think.
Here you can also see that I was not cautious enough with the folding direction and the design. The folding did not follow the design of the paper.
My plan is to use Japanese washi to make boxes for presents. I will show later in an update how those boxes will look - hopefully better than this (training) box.
Paper: When I digitized my books, I cut off the spine so I could use an automatic scanner for scanning the text pages. Usually, I kept the first and last paper pages which often are coloured and/or have some design. They also are a little bit heavier than the normal paper of the books.
For making the box below I used such a page.
Plan: I want to make a box, 14 cm long, 2 cm wide and 2 cm high. I need the box and a cover for it: so 2 boxes, the first one with the dimensions above and the second one, the cover box, a bit larger with 14.5 cm long and 2.5 cm wide.
Actually, instead of 0.5 cm difference, it will be better to use only 0.3cm difference.
You will see later, why.
I folded the sheet along the long side so that it had three sections of 2cm each. This should be done with care - check for the design on the outside (I realized this too late).
The cover has three sections, 2+2.5+2cm.
At the ends, I folded two sections of 2cm perpendicular to the length. In the inner section, I folded it across.
(It is easier to make than to explain.)
After folding, it looks like in the picture. As the paper is a bit stiff, it is necessary to add adhesive to keep the papers together.

The larger one is the cover of the smaller one. 0.5cm is a bit too much difference, 0.3cm will fit better, I think.
Here you can also see that I was not cautious enough with the folding direction and the design. The folding did not follow the design of the paper.


Comments
Post a Comment